
Tracking down every Caravan SandWitch collectible location can feel overwhelming when the map of Cigalo stretches across deserts, ruins, and abandoned settlements. This guide breaks down the all collectibles map by region, covering rare items, hidden items, and the exact item locations you need for a 100% run. You will learn which tools unlock which secrets and how to plan an efficient route that saves hours of backtracking.
How the collectible economy is structured
Before you start sweeping the map, you need to understand how Caravan SandWitch structures its collectibles. The game separates items into two main categories: components (the crafting currency) and cuddly toys (the cosmetic collectibles tied to achievements). Each category follows its own spawn logic, and knowing the difference prevents wasted trips.
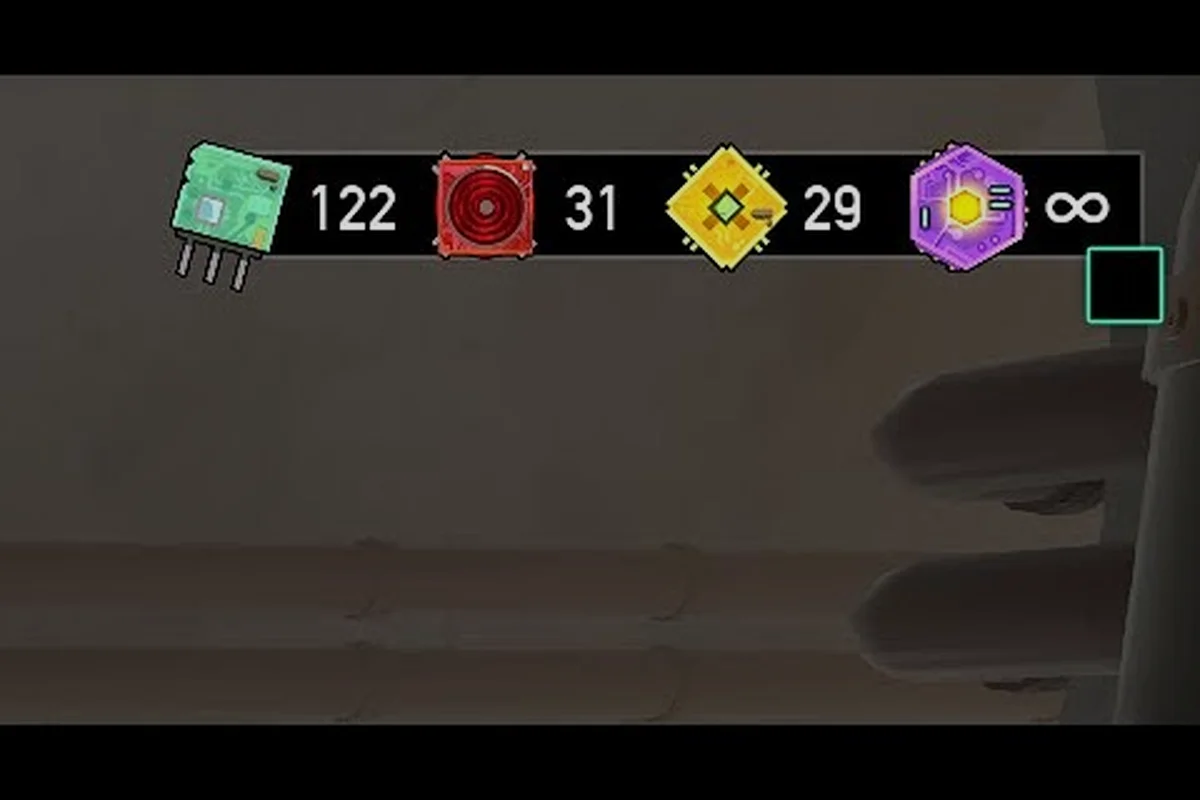
Components come in four rarity tiers, and each tier behaves differently across the world. According to community data from the official Caravan SandWitch website, the planet Cigalo is divided into zones that progressively demand better van tools. This directly affects which collectible locations you can reach early versus late in your playthrough.
| Rarity Tier | Color | Typical Locations | Tool Requirement |
|---|---|---|---|
| Common | Green | Ground level, rooftops, open ruins | None (basic scanning) |
| Uncommon | Red | Old vehicles, robot husks, elevated ledges | Grappling hook |
| Rare | Yellow | Puzzle rooms, sealed chambers | Energy grapple or antenna hack |
| Exceptional | Purple | Desert zone only, hidden alcoves | All tools + late-game upgrades |
The rarity tier system matters because it dictates your farming strategy. Common components appear everywhere, but rare and exceptional items require specific upgrades. A detailed breakdown of which tools unlock which areas appears in our collectible items guide, which pairs well with the location data here.
How Scanning Reveals Hidden Items
Your van's antenna scan is the single most important tool for finding collectibles. When you activate the scan, nearby items pulse with a colored outline that matches their rarity tier. This makes the Caravan SandWitch collectibles map much easier to read, because you can sweep a zone and immediately spot anything you missed.
The scan has a limited radius, so you need to move systematically. Community reports suggest the effective range is roughly 30 meters, which means you should stop every few hundred meters and scan in a full circle. Players who rush through zones without scanning consistently miss hidden items that sit just off the main path.
Region-by-Region Collectible Locations
Cigalo's map splits into distinct regions, and each one holds a different mix of collectibles. This section works as a practical Caravan SandWitch collectibles map replacement, describing where to look rather than showing a static image. The regions appear in the order you typically unlock them.
Estello Village: the tutorial hub's hidden loot
The opening region teaches you the basics, and it holds a surprising number of collectibles for its size. Estello Village contains roughly 15 common components scattered across rooftops and balconies, plus two cuddly toys that are easy to miss if you rush the story.
| Collectible Type | Count in Zone | Notable Spot |
|---|---|---|
| Common components | 15 | Rooftops behind the water tower |
| Uncommon components | 4 | Inside the broken greenhouse |
| Cuddly toys | 2 | Under the pier and behind the bakery |
| Rare components | 1 | Puzzle room near the train station |
The puzzle room near the train station requires the grappling hook, so you cannot fully clear this zone on your first visit. Mark it on your mental map and return after your first van upgrade. The cuddly toy under the pier is accessible immediately, but the one behind the bakery needs you to climb a stack of crates that blends into the environment.
Rose's Retreat and Hydropost: ziplines between zones
Rose's Retreat introduces vertical exploration, and the Hydropost area tests your ability to read the environment. These two zones connect through a series of ziplines, and several collectible locations sit along those routes. You will find more uncommon components here than in the starting zone, which helps you craft your first meaningful upgrades.
The old vehicle graveyard near Rose's Retreat holds six uncommon components, but each one requires the grappling hook to reach. The vehicles are stacked on top of each other, creating a makeshift climbing puzzle. Community testing shows that the components despawn if you leave the zone and return without collecting them, so clear this area in one pass.
Cuddly toys in this region are trickier. The Hydropost control room contains one toy that only appears after you restore power to the facility. If you complete the story objective and leave, you can still return later, but the toy is easy to overlook because it sits in a dark corner behind a console.
Desert Zone and Exceptional Components
The desert zone unlocks in Chapter 2, and it completely changes your collectible strategy. This is the only region where exceptional components spawn, and they are required for the highest-tier van upgrades. According to a detailed bonus-action.com walkthrough, exceptional components appear as purple hexagons and demand advanced tools to reach.
| Collectible Type | Count in Zone | Tool Requirement |
|---|---|---|
| Exceptional components | 8 | Energy grapple + antenna hack |
| Rare components | 12 | Various puzzle mechanics |
| Cuddly toys | 5 | Mix of all tools |
| Secret items | 3 | Requires full upgrade path |
The desert ruins hold most of the exceptional components, but they are locked behind puzzle rooms that require the energy grapple. These puzzles typically involve powering generators and using the grapple to channel energy across gaps. The timing is forgiving, but the route to each component is not obvious.
Hidden Items in the Desert
Beyond the standard collectibles, the desert hides three secret items that do not appear on any in-game tracker. These are the true test of your exploration skills, and they reward you with unique cosmetic options for your van. The first secret item sits inside a collapsed tunnel that looks like a dead end; you need to use the antenna hack on a nearby terminal to open a false wall.
The second secret item requires you to follow a series of animal tracks across the dunes. The tracks disappear in the sand frequently, so you need to scan frequently to keep the trail visible. Players report that this takes about 15 minutes of careful navigation, and the reward is a custom paint job for the van.
The third secret item is the most elusive. It only spawns after you complete all community side tasks in the desert zone, and it appears at the highest point of the region. You need every tool in the game to reach it, making it a true endgame collectible.
Advanced Collection Strategies and Route Planning
Once you understand where items spawn, the next challenge is collecting them efficiently. A poorly planned route can add hours to your playthrough, while a smart approach lets you clear entire regions in under an hour. This section covers the strategies that experienced players use to optimize their collectible runs.
The scan-and-sweep method is the foundation of efficient collection. Instead of wandering aimlessly, you move in a grid pattern across each zone, stopping every 30 meters to scan. When the scan reveals an item, you mark its location and continue the grid. After you complete the grid, you return to collect everything you found. This method prevents the frustration of spotting an item you cannot reach and forgetting to come back.
Optimal Tool Upgrade Order for Collectors
Your tool upgrades directly determine which collectible locations you can access, so the order matters. The grappling hook should be your first priority because it unlocks the majority of uncommon components and several cuddly toys. The antenna hack comes second, as it opens puzzle rooms that hold rare components. The energy grapple is last, but it is essential for the desert zone's exceptional components.
| Upgrade Priority | Tool | Collectibles Unlocked |
|---|---|---|
| 1st | Grappling hook | Uncommon components, 30% of cuddly toys |
| 2nd | Antenna hack | Rare components, puzzle rooms |
| 3rd | Energy grapple | Exceptional components, desert secrets |
| 4th | Van speed boost | Faster travel between zones |
The van speed boost is not strictly required for any collectible, but it dramatically reduces travel time between regions. Players who skip it spend noticeably longer shuttling between the desert and the starting zone. If your goal is 100% completion, prioritize it after the energy grapple.
For a complete checklist of every item in the game, including souvenir shop purchases and story keepsakes, the collectibles checklist provides a trackable list. You can use it alongside this location guide to mark off each item as you collect it.
Common Mistakes That Waste Time
Even experienced players make mistakes during collectible runs, and these errors can cost you hours of backtracking. The most common issue is skipping the antenna scan in areas you have already visited. Items can spawn in previously cleared zones after story progression, so always rescan areas when you return for story missions.
Another frequent mistake is ignoring vertical space. Caravan SandWitch places a significant number of collectibles on rooftops, ledges, and elevated platforms. If you only search at ground level, you will miss roughly 40% of the items in any given zone. Make a habit of looking up and scanning elevated areas before moving on.
The Point of No Return Warning
The game features a point of no return late in the story, and this affects your collectible run. According to the Steam Community 100% Achievement Guide, the mission Rescue Plan triggers when Sauge leaves for TARAASK with Rose. After this point, you cannot return to Cigalo to collect missed items.
This means you should complete all collectible hunting before starting the Rescue Plan mission. The game does not warn you explicitly, so track your progress carefully. If you are missing items, finish them before advancing the story. The all cuddly toy locations guide can help you verify you have found every toy before the point of no return.
Frequently Asked Questions
How many collectibles are in Caravan SandWitch?
The game contains over 100 components across four rarity tiers, plus 26 cuddly toys and several secret items. The exact count varies slightly depending on how you classify story-related items, but community data suggests roughly 130 total collectible locations across all regions of Cigalo.
Do collectibles respawn after you collect them?
No, components and cuddly toys do not respawn. Each collectible location is a one-time pickup, which means you cannot farm a specific spot for unlimited resources. This makes the Caravan SandWitch all collectibles guide essential for players who want to craft every upgrade.
What is the hardest collectible to find?
The third secret item in the desert zone is widely considered the hardest because it requires every tool in the game and only spawns after completing all community side tasks. Players report spending over an hour searching for it without a guide, making it the final obstacle for 100% completion.
Can you collect everything before the point of no return?
Yes, every collectible is accessible before the Rescue Plan mission, provided you have upgraded your van with all necessary tools. The energy grapple is the last tool you need, and once you have it, you can clear every region completely before advancing the story.
Are there any mobile-specific collectible differences?
The mobile version of Caravan SandWitch features the same collectible locations as the PC release, according to community reports. However, some players note that the smaller screen makes spotting hidden items more difficult, so frequent scanning becomes even more important on mobile devices.